


Udemy – Bridge Specialization – Revit + Robot & OpenBridge – AulaGEO – 5802774
Udemy – Bridge Specialization – Revit + Robot & OpenBridge – AulaGEO – 5802774
With this course, you will learn how to take advantage of these tools so that the process of designing structures for bridges is faster, more efficient, and of higher quality.
,
,
LEVEL I CONTENT
,
,
Level 1 of Bentley Open Bridge is a beginner’s guide, where we learn the basics of this software. Starting with a short theoretical session, we assume that you have basic know-how about bridges, after a quick review of some common terms we will get familiar with the interface of Bentley Open Bridge. #AulaGEO
,
,
After a brief introduction, we will proceed with an exercise in which we will create Precast Girder 2 Span Straight Bridge Model. In the process of making this bridge we will learn multiple procedure like adding a bridge Model, support Lines, bridge Decks, Girders, placing, and Modifying Piers, Abutments, Bearings, and Barriers.
,
LEVEL I – DESIGN BRIDGES USING OPEN BRIDGES + LumenRT
,
Lecture 1: Theory
,
LEVEL I – GETTING STARTED
,
Lecture 2: Introduction
,
Lecture 3: Initiating Open Bridge Modler from Open Bridge Designer
,
Lecture 4: User Interface
,
Lecture 5: Importing .tin file (Terrain Model)
,
LEVEL I – PRECAST GIRDER 2 SPAN STRAIGHT BRIDGE MODEL
,
Lecture 6: Adding a bridge Model
,
Lecture 7: Adding Support Lines
,
Lecture 8: Adding Bridges Decks
,
Lecture 9: Adding Girders
,
Lecture 10: Placing and Modifying Pier
,
Lecture 11: Placing Abutments
,
Lecture 12: Placing Bearings and Stepped Cap
,
Lecture 13: Placing Barriers
,
LEVEL I – PRECAST BEAM 2 SPAN STRAIGHT BRIDGE MODEL – USING WIZARD
,
Lecture 14: Adding Bridge Model
,
Lecture 15: Place Excavation
,
Lecture 16: Place Diaphragms
,
LEVEL I – Lumen RT – Lessons asked by students
,
Lecture 17: Lumen RT
,
,
LEVEL II CONTENT
,
,
Level 2 of Bentley Open Bridge is an intermediate-level guide, where we move one step ahead of the basics of this software. Starting with a short theoretical session, we assume that you have basic know-how about bridges, after a quick review of some common terms we will get familiar with the interface of Bentley Open Bridge.
,
,
After a brief introduction, we will proceed with an exercise in which we will create the Steel Girder 2 Span Straight Bridge Model. In process of making this bridge, we will learn multiple procedures like adding a bridge Model, support Lines, bridge Decks, Girders, placing and Modifying Piers, Abutments, Bearings, and Barriers. #AulaGEO
,
,
After the successful creation of the Steel Girder 2 Span Straight Bridge Model using a conventional method, we will learn how to make the same using Wizard method which is way more convenient and gets results with just a few clicks and inputs. Furthermore, we will look into field splices. After that, you can compare both models at your convenience.
,
,
After learning these two techniques for the creation of Steel Girder 2 Span Straight Bridge Model, we will learn how to create a curved bridge with custom-built templates of deck and pier which lead to our final exercise in which we will learn how to create a Segmental Bridge Model.
,
,
After completion of these exercises, we will learn how to create our custom templates and save them in the library for future usage. Reporting is an important part once we are done with the bridge model so we will learn several tips, tricks, and techniques to export different types of reports.
,
,
At the end of the session, you can review the theoretical part where you can learn more about the features introduced in the latest updates.
,
,
LEVEL II – DESIGN BRIDGES USING OPEN BRIDGE – LEVEL 2 – INTERMEDIATE
,
Lecture 18: Exercise Basic Design
,
Lecture 19: Exercise Adding Girders
,
Lecture 20: Exercise Adding Cross Frames
,
Lecture 21: Placing Sheer Studs
,
Lecture 22: Exercise: Placing Pier and Abutments
,
Lecture 23: Exercise: Placing Bearings, Stepped Cap and Barriers 1
,
LEVEL II -EXERCISE: STEEL GIRDER 2 SPAN STRAIGHT BRIDGE MODEL – USING WIZARD
,
Lecture 24: Adding Bridge Model using Wizard
,
Lecture 25: Adding Sheer Studs using Wizard
,
Lecture 26: Creating and adding Field Splices Template using Wizard
,
LEVEL II – EDITING TEMPLATES FOR STEEL GIRDER CURVED BRIDGE – USING WIZARD
,
Lecture 27: Slanted / Curved Deck Template
,
Lecture 28: Custom Hammer Head Pier Template
,
Lecture 29: Creating Curved Bridge Using Custom Templates
,
LEVEL II – EXERCISE: SEGMENTAL BRIDGE MODEL
,
Lecture 30: Adding Bridge Model
,
Lecture 31: Placing Segments
,
Lecture 32: Reports and Constraints Tool
,
Lecture 33: Modeling Piers, Abutments and Barriers
,
LEVEL II – CUSTOM TEMPLATES
,
Lecture 34: Deck Template
,
Lecture 35: Barrier Template
,
Lecture 36: Pier Template
,
Lecture 37: Material Template
,
LEVEL II – REPORTING
,
Lecture 38: Quantity Report
,
Lecture 39: Input Report
,
Lecture 40: Deck Elevation Report
,
Lecture 41: Bearing Seat Report
,
Lecture 42: Pier Drawing
,
Lecture 43: Section Drawing
,
LEVEL II – ADDITIONAL NOTES
,
Lecture 44: Enhancements in latest versions
,
,
LEVEL III CONTENT
,
,
In this level, you will learn a new way to manage your bridge projects using AutoDesk Revit and Robot Structure.
,
,
Revit software is the world leader in building design using BIM (Building Information Modeling), allowing professionals not only to generate plans but to coordinate the entire building model including design features. Revit is designed to include design tools for bridge structures.
,
,
When you assign elements to a project, you can:
,
-
Automatically generate top plans, elevations, sections, and final impressions
-
Perform static calculations in the cloud
-
Perform advanced calculations in specialized programs such as Robot Structural Analysis
-
Create structural and analytical models
-
Quickly create and document detailed plans
-
Improve your performance when working on a BIM model.
,
,
LEVEL III – STRUCTURE BRIDGES DESIGN – USING REVIT & ROBOT
,
Lecture 45: Introduction
,
Lecture 46: REVIT Introduction
,
LEVEL III – MODELING AND ANALYSIS
,
Lecture 47: Simple beam bridge modeling
,
Lecture 48: Load cases – Aanlytical model – Exporting to Robot
,
Lecture 49: Modeling skew simple bridge of varying sections
,
LEVEL III – FINAL RESULTS
,
Lecture 50: Interior RFT- BOQ and final layout
,
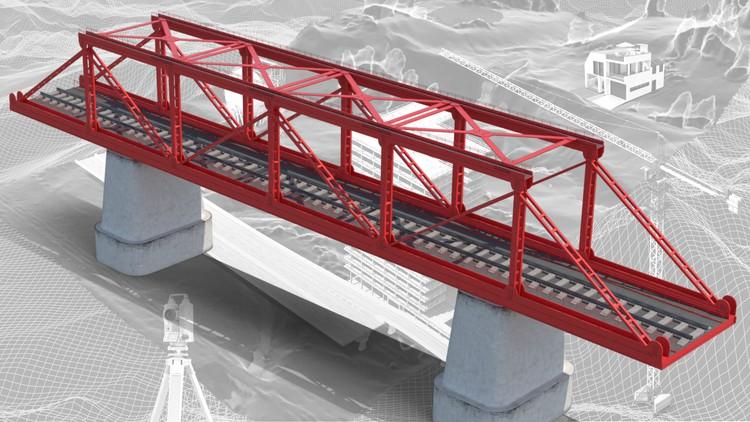
LEVEL III – TRUSS BRIDGE DESIGN AND MODELING
,
Lecture 51: Introduction
,
Lecture 52: Revit modeling – Truss System
,
Lecture 53: Robot Analysis
,
,
Course Orientation
,
We will follow the logical order in which you would develop a personal project. Instead of considering each theoretical aspect of the program, we will focus on following the workflow that best suits a real case and give you some tips to achieve the best results.
,
,
You will get prepared files that will allow you to follow the progress of the course from where you consider it most necessary by guiding you to use the tools yourself while watching the classes.
,
,
The course content is updated regularly to include important updates or points that can help you improve your learning and you will have access to them in real time so you can improve your continuous skills.
